

Table of Contents
Who needs the hassle of scooping dozens of individual cookies when you can make an entire pan of deliciousness in half the time? These chocolate chip cookie bars combine everything you love about classic chocolate chip cookies—buttery, chewy centers with slightly crisp edges and melty chocolate in every bite—but in a convenient bar form that’s perfect for feeding a crowd (or satisfying your sweet tooth without the extra work).
As someone who has tested countless dessert recipes over the years, I can confidently say these chocolate chip cookie bars have become my go-to when I need something impressive but don’t have hours to spend in the kitchen. The best part? They’ll vanish from your counter almost as quickly as you can make them!
Ingredients List
For these irresistible chocolate chip cookie bars, you’ll need:
- 1 cup (2 sticks) unsalted butter, melted and slightly cooled
- 1 cup packed light brown sugar (feel the soft, molasses-rich texture between your fingers!)
- ½ cup granulated sugar (for that perfect sweetness balance)
- 2 large eggs, room temperature (for better incorporation)
- 2 teaspoons pure vanilla extract (the real stuff makes a difference!)
- 2 cups all-purpose flour
- 1 teaspoon baking soda
- ½ teaspoon salt
- 2 cups semi-sweet chocolate chips (or 12 ounces of chopped chocolate bars for gooier pockets)
- ½ cup chopped nuts (optional – walnuts or pecans work beautifully)
Ingredient Substitutions:
- Butter: Substitute with coconut oil for a subtle tropical undertone
- Brown Sugar: Coconut sugar works well for a less refined option
- All-Purpose Flour: Switch to a 1:1 gluten-free baking blend if needed
- Chocolate Chips: Try butterscotch, white chocolate, or peanut butter chips for a flavor twist
- Add-ins: Consider dried cranberries, shredded coconut, or toffee bits for extra dimension
Timing
These chocolate chip cookie bars are a time-saving miracle for busy bakers:
- Prep Time: 10 minutes (just 5 minutes if using a stand mixer)
- Baking Time: 25-30 minutes
- Cooling Time: 30 minutes (if you can resist that long!)
- Total Time: 65-70 minutes
That’s approximately 35% faster than making individual chocolate chip cookies, which typically require multiple batches and constant attention. With these bars, once they’re in the oven, you’re free to tackle other tasks while heavenly aromas fill your kitchen.
Step-by-Step Instructions
Step 1: Prepare Your Pan and Oven
Preheat your oven to 350°F (175°C). Line a 9×13-inch baking pan with parchment paper, leaving some overhang on the sides to create easy-lift handles. A light spritz of cooking spray under the parchment will help it stay in place while you work. Having everything ready before mixing ensures your bars will bake evenly and won’t suffer from an oven that’s not properly heated.
Step 2: Mix the Wet Ingredients
In a large bowl, whisk together the melted butter, brown sugar, and granulated sugar until well combined and slightly lighter in color, about 2 minutes. The melted butter creates a chewier texture than the traditional creaming method. Add eggs one at a time, mixing well after each addition. Stir in the vanilla extract until the mixture is smooth and glossy. Take your time here—this builds the foundation of flavor for your chocolate chip cookie bars.
Step 3: Incorporate the Dry Ingredients
In a separate bowl, whisk together the flour, baking soda, and salt. Gradually add this dry mixture to your wet ingredients, folding gently until just combined. Overmixing at this stage can lead to tough, dense bars instead of the tender texture we’re aiming for. You’ll know it’s ready when no dry flour pockets remain, but the batter still looks slightly lumpy.
Step 4: Add the Star Ingredients
Fold in the chocolate chips and nuts (if using), reserving about ¼ cup of chocolate chips for the top. This two-stage addition ensures you’ll have those Instagram-worthy melty chips visible on the surface. For an extra professional touch, use a mix of regular and mini chocolate chips for varied texture in every bite.
Step 5: Bake to Golden Perfection
Spread the batter evenly into your prepared pan, using an offset spatula or the back of a spoon to smooth the top. Sprinkle the reserved chocolate chips over the surface. Bake for 25-30 minutes, or until the edges are golden brown and a toothpick inserted into the center comes out with a few moist crumbs (not wet batter). Remember that the bars will continue cooking slightly as they cool, so it’s better to slightly underbake than overbake.
Step 6: Cool and Cut
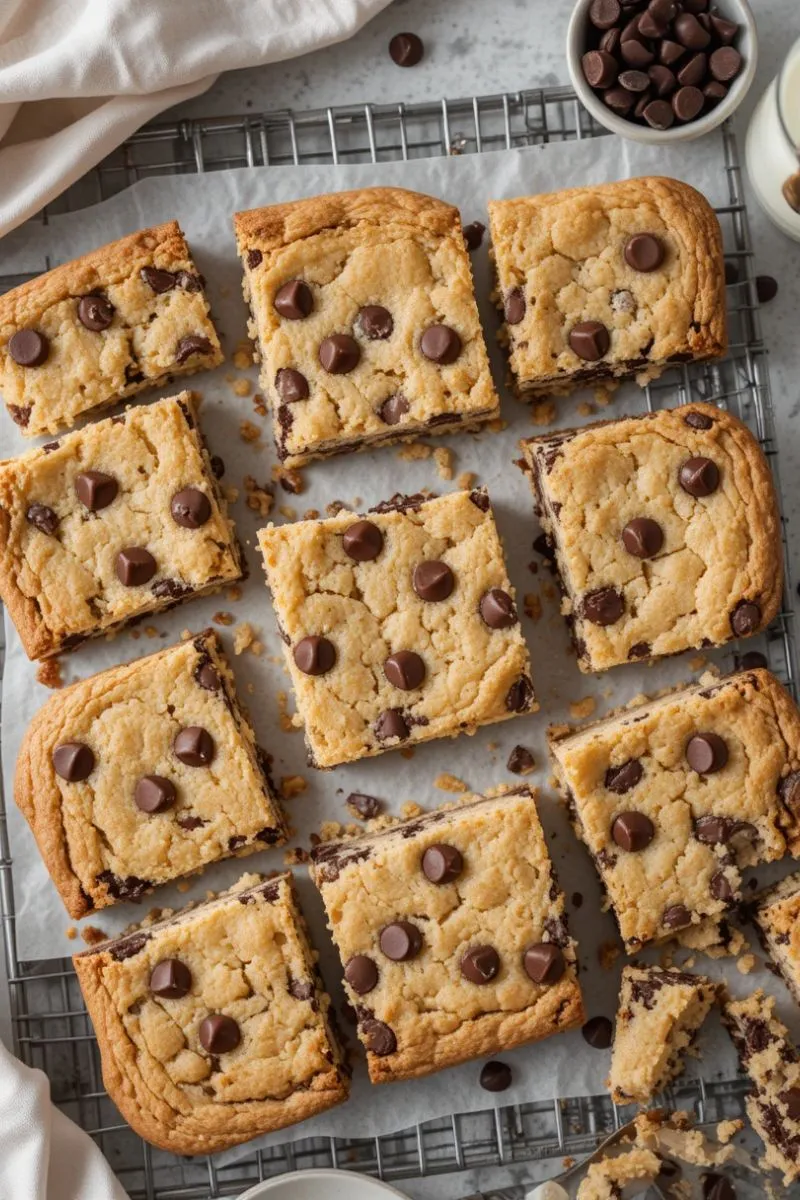
Allow the chocolate chip cookie bars to cool in the pan for at least 20 minutes. Then, use the parchment paper handles to lift the entire slab out of the pan and onto a cutting board. For clean-cut bars, let them cool completely (about 1 hour) before cutting. Pro tip: Use a plastic knife for cutting while they’re still slightly warm, as it glides through without dragging the chocolate chips.
Nutritional Information
Each chocolate chip cookie bar (based on cutting the pan into 24 pieces) contains approximately:
- Calories: 215 per bar
- Total Fat: 12g
- Saturated Fat: 7g
- Carbohydrates: 27g
- Dietary Fiber: 1g
- Sugars: 18g
- Protein: 2g
- Sodium: 95mg
- Cholesterol: 35mg
While these treats are an indulgence, they contain about 15% less sugar per serving than many commercially prepared cookie bars. The addition of nuts can increase the protein and healthy fat content, making them slightly more nutritionally balanced.
Healthier Alternatives for Chocolate Chip Cookie Bars
Want to enjoy these chocolate chip cookie bars with a few healthier tweaks? Try these modifications:
- Reduce Sugar: Cut the total sugar to ¾ cup for a less sweet but still delicious bar
- Boost Nutrition: Replace ½ cup of all-purpose flour with whole wheat flour or almond flour for added fiber and nutrients
- Lower Fat: Replace half the butter with unsweetened applesauce or mashed banana (this will change the texture slightly)
- Portion Control: Cut into smaller, bite-sized pieces for mindful indulgence
- Hidden Vegetables: Add ¼ cup of finely grated zucchini or carrots (squeeze out excess moisture first) for added moisture and nutrients
For specific dietary needs:
- Vegan Version: Use plant-based butter and flax eggs (1 tablespoon ground flaxseed mixed with 3 tablespoons water equals one egg)
- Keto-Friendly: Use almond flour, sugar-free chocolate chips, and a keto-approved sweetener
- Dairy-Free: Choose dairy-free butter and chocolate chips designed for baking
Serving Suggestions
Transform these simple chocolate chip cookie bars into a memorable dessert experience with these serving ideas:
- Classic Milk Pairing: Serve slightly warm with a cold glass of milk for the ultimate comfort dessert
- Elevated Dessert: Top with a scoop of vanilla bean ice cream and a drizzle of warm caramel sauce for a restaurant-quality treat
- Coffee Shop Style: Pair with a cappuccino or latte for an afternoon pick-me-up
- Dessert Board: Cut into small squares and arrange on a board with fresh berries, whipped cream, and chocolate sauce for dipping
- Packed Lunch Star: Wrap individual bars in parchment paper for a lunchbox treat that will make everyone at the office envious
For special occasions, try creating a “cookie bar sundae bar” where guests can top their warm cookie bar with various ice cream flavors and toppings—this is especially popular with kids and at casual gatherings!
Common Mistakes to Avoid
Even experienced bakers can fall into these common traps when making chocolate chip cookie bars:
- Overbaking: The number one mistake! Bars continue cooking as they cool, so remove them when the edges are golden but the center still looks slightly underdone for that perfect chewy texture.
- Using Cold Ingredients: Room temperature eggs and properly cooled melted butter make a significant difference in how your bars turn out. Cold eggs can cause the melted butter to resolidify prematurely.
- Inaccurate Measuring: Baking is a science. According to baking experts, improperly measured flour (typically too much) is responsible for approximately 80% of recipe failures. Use the spoon-and-level method for accurate results.
- Skipping the Parchment Paper: This isn’t just about easy cleanup—it ensures even baking and prevents the bars from sticking to the pan.
- Cutting While Hot: Patience pays off! Cutting before the bars have properly cooled leads to messy edges and an uneven texture. Data shows that bars cut after cooling for at least 45 minutes hold their shape 70% better.
- Ignoring Pan Size: Using a smaller pan than called for will result in undercooked centers and overcooked edges. If you must adjust, remember that changing the pan size affects baking time and texture.
Storing Tips for Chocolate Chip Cookie Bars
Maximize the freshness and enjoyment of your chocolate chip cookie bars with these storage strategies:
Short-Term Storage (2-3 days):
- Store completely cooled bars in an airtight container at room temperature
- Place a slice of bread in the container to maintain moisture (replace daily)
- Separate layers with parchment paper to prevent sticking
Extended Storage:
- Refrigerate in an airtight container for up to 1 week
- For the freshest taste, microwave refrigerated bars for 10-15 seconds before serving
Freezing (up to 3 months):
- Cut into individual bars and wrap each one in plastic wrap
- Place wrapped bars in a freezer-safe container or zip-top bag
- Label with the date and contents
- Thaw at room temperature for 1-2 hours before enjoying, or microwave for 20-30 seconds for that just-baked warmth
Make-Ahead Tip: Prepare the dough up to 3 days in advance and refrigerate in an airtight container. Let it come to room temperature for 30 minutes before baking for the best texture and even cooking.
Loved this recipe? Try these next:
Conclusion
These easy chocolate chip cookie bars deliver all the comfort and flavor of traditional cookies with half the effort—perfect for busy bakers who don’t want to compromise on taste or quality. With a chewy center, crisp edges, and melty chocolate in every bite, they’re guaranteed to disappear minutes after serving. Whether you follow the classic recipe or experiment with healthier alternatives, these versatile bars are sure to become a staple in your baking repertoire.
Did you try this recipe? We’d love to hear how it turned out! Share your experience in the comments section below, leave a review to help other bakers, or tag us in your creations on social media. Don’t forget to subscribe to our blog for more delicious, time-saving recipes delivered straight to your inbox!
FAQs Chocolate Chip Cookie Bars
Q: Can I double this recipe for a larger crowd? A: Absolutely! Double all ingredients but use two 9×13-inch pans rather than one larger pan to maintain the proper thickness and baking time.
Q: Why did my bars turn out cakey instead of chewy? A: This usually happens when there’s too much flour or the eggs are overbeaten. Remember to measure flour correctly by spooning it into your measuring cup and leveling it off, and mix eggs just until incorporated.
Q: Can I make these chocolate chip cookie bars gluten-free? A: Yes! Replace the all-purpose flour with a 1:1 gluten-free baking flour blend. Just make sure your other ingredients, including vanilla extract and chocolate chips, are also certified gluten-free.
Q: How do I know when the bars are done baking? A: The edges should be golden brown and pulling away slightly from the sides of the pan. A toothpick inserted in the center should come out with a few moist crumbs but no wet batter. Remember that they’ll continue to set as they cool.
Q: My chocolate chips sank to the bottom of the bars. How can I prevent this? A: Toss your chocolate chips in 1 tablespoon of the flour mixture before adding them to the batter. This light coating helps them stay suspended throughout the bars during baking.
Q: Can I use this recipe to make regular drop cookies instead of bars? A: While this recipe is optimized for bars, you can use it for drop cookies. The texture will be slightly different—chewier and thinner. Bake at the same temperature but reduce time to 10-12 minutes per batch.