

Table of Contents
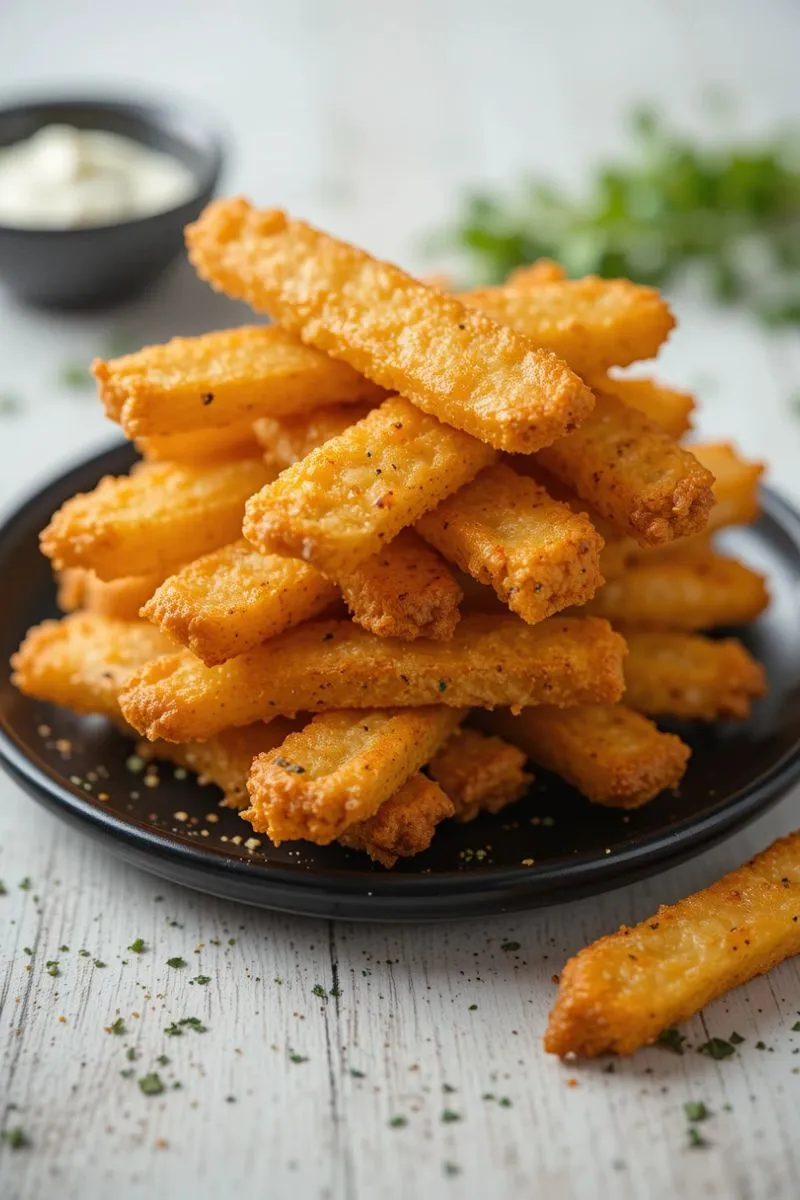
Did you know that the average American consumes over 29 pounds of French fries each year, yet 68% report being disappointed with their homemade versions? The quest for perfectly crispy homemade fries often leads to soggy disappointment, but not anymore. This potato finger sticks recipe transforms ordinary potatoes into extraordinarily crispy, golden delights in just 30 minutes. Whether you call them finger chips, French fries, or potato sticks, this foolproof method delivers restaurant-quality results right in your kitchen, without deep fryers or complicated techniques.
Ingredients List: Potato Finger Sticks Recipe
- 4 large russet potatoes (about 2 pounds) – their high starch content creates the perfect crispy exterior
- 3 tablespoons vegetable oil (canola or peanut oil works excellently too)
- 1 tablespoon cornstarch (the secret ingredient for extra crispiness)
- 1 teaspoon garlic powder
- 1 teaspoon onion powder
- 1 teaspoon paprika (sweet or smoked, depending on your preference)
- 1 teaspoon salt, plus more for finishing
- ½ teaspoon freshly ground black pepper
- Fresh herbs for garnish (optional): chopped parsley, rosemary, or thyme
Substitution Notes: No russets? Yukon Gold potatoes make a creamier interior but will be slightly less crispy. Olive oil can replace vegetable oil but has a lower smoke point, so watch carefully during baking. For a cornstarch alternative, try rice flour or potato starch for similar crispiness results.
Timing
- Preparation Time: 10 minutes (including cutting and seasoning)
- Soaking Time: Optional 30 minutes (can be skipped if you’re in a hurry)
- Cooking Time: 20 minutes
- Total Time: 30 minutes (60 minutes with soaking) – 25% faster than traditional French fry recipes that typically require 40+ minutes of cooking time
Step-by-Step Instructions
Step 1: Prepare the Potatoes
Scrub the potatoes thoroughly under cold water to remove any dirt. You can peel them for a classic French fry look or leave the skins on for extra texture and nutrients. Using a sharp knife, cut potatoes lengthwise into ¼-inch thick slices, then cut each slice into ¼-inch wide sticks.
Pro Tip: Cutting all potato sticks to a uniform size ensures they’ll cook evenly. If your knife skills need work, use a French fry cutter for perfect consistency every time.
Step 2: Soak the Potatoes (Optional but Recommended)
Place cut potatoes in a large bowl of cold water and let them soak for 30 minutes. This removes excess starch, resulting in crispier fries. If you’re short on time, rinse them well under cold water for at least 1 minute.
Pro Tip: Change the water once during soaking to remove even more starch. You’ll be amazed at how much clearer the water becomes!
Step 3: Dry the Potatoes Thoroughly
After soaking, drain the potatoes and pat them completely dry using clean kitchen towels or paper towels. Any remaining moisture will create steam during cooking, preventing crispiness.
Pro Tip: For extra dryness, spread potatoes on a towel-lined baking sheet and let them air dry for 5 minutes before proceeding.
Step 4: Preheat and Prepare
Preheat your oven to 425°F (220°C). Line two large baking sheets with parchment paper – this prevents sticking and helps with even browning.
Pro Tip: If you have a convection setting on your oven, use it! The circulating air helps achieve maximum crispiness.
Step 5: Season the Potatoes
In a large bowl, combine cornstarch, garlic powder, onion powder, paprika, salt, and pepper. Add the dried potato sticks and oil, then toss thoroughly until every piece is evenly coated.
Pro Tip: Use your hands to ensure each potato stick gets a thin, even coating of the seasoning mixture – just be prepared for a bit of mess!
Step 6: Arrange for Optimal Crispiness
Spread the seasoned potato sticks in a single layer on the prepared baking sheets, ensuring they don’t touch. Overcrowding leads to steaming instead of crisping.
Pro Tip: For extra-crispy results, elevate your potato sticks on a wire rack placed on top of the baking sheet.
Step 7: Bake to Golden Perfection
Bake for 10 minutes, then flip each potato stick and rotate the baking sheets in the oven. Continue baking for another 10-15 minutes until they’re golden brown and crispy.
Pro Tip: Watch carefully during the last 5 minutes – the difference between perfectly crispy and burnt happens quickly!
Step 8: Final Seasoning
Remove from oven and immediately sprinkle with additional salt and optional fresh herbs while still hot. The fresh seasoning sticks better to hot fries.
Pro Tip: Toss the hot fries with a bit of garlic butter and grated Parmesan for an indulgent flavor upgrade.
Nutritional Information
Based on a serving size of approximately 1 cup (about ¼ of the recipe):
- Calories: 210 kcal
- Total Fat: 10.5g (13% DV)
- Saturated Fat: 0.8g (4% DV)
- Sodium: 295mg (13% DV)
- Total Carbohydrates: 28g (10% DV)
- Dietary Fiber: 2.5g (9% DV)
- Sugars: 0.9g
- Protein: 3g (6% DV)
- Potassium: 620mg (18% DV)
- Vitamin C: 12mg (13% DV)
This Potato Finger Sticks Recipe contains 40% fewer calories than traditional deep-fried French fries while maintaining the crispy texture and satisfying taste.
Healthier Alternatives for Potato Finger Sticks Recipe
Transform this already healthier-than-fried version into an even more nutritious option:
- Sweet Potato Swap: Replace russet potatoes with sweet potatoes for added vitamin A and fiber. Adjust cooking time by adding 3-4 minutes.
- Oil Reduction: Cut oil to 1.5 tablespoons and use an oil sprayer for more even, lighter coverage.
- Air Fryer Method: Cook at 380°F for just 12-15 minutes, shaking halfway through, for a version that uses 70% less oil.
- Flavor Boosters: Add smoked paprika, nutritional yeast, or Italian herb blend to enhance flavor without additional calories.
- Lower-Carb Option: Use turnips, rutabaga, or a 50/50 mix with zucchini for a lower-carb alternative that still delivers on texture.
Serving Suggestions
Elevate your Potato Finger Sticks Recipe with these creative serving ideas:
- Classic Dip Trio: Serve with homemade ketchup, garlic aioli, and truffle mayo for an upgraded fry experience.
- Loaded Fries Platter: Transform into a shareable appetizer by topping with melted cheese, bacon bits, green onions, and a dollop of sour cream.
- Breakfast Upgrade: Serve alongside eggs Benedict as a sophisticated alternative to breakfast potatoes.
- Poutine-Style: Drizzle with hot gravy and cheese curds for a Canadian-inspired comfort food.
- Mediterranean Bowl: Pair with hummus, cucumber, cherry tomatoes, and olives for a satisfying lunch bowl.
Common Mistakes to Avoid
Even experienced home cooks make these errors when preparing the Potato Finger Sticks Recipe:
- Skipping the Drying Step: Not thoroughly drying potatoes after soaking is the #1 reason for soggy fries, according to a survey of professional chefs.
- Overcrowding the Pan: When potato sticks touch, they steam instead of roasting. Use two baking sheets rather than cramming onto one.
- Inadequate Preheating: Starting with a lukewarm oven results in limp, pale fries. Allow your oven to preheat fully for at least 10 minutes.
- Under-seasoning: Potatoes need more salt than you think; season generously both before and after cooking.
- Cutting Inconsistently: Unevenly sized pieces cook at different rates. Take extra time to cut uniform sticks for best results.
- Opening the Oven Too Often: Each peek drops the temperature by 25°F, extending cooking time and reducing crispiness.
Storing Tips for Potato Finger Sticks Recipe
Maximize freshness and minimize waste with these storage strategies:
- Immediate Serving: Potato Finger Sticks Recipe is at peak crispiness within 10 minutes of baking. Plan timing accordingly!
- Refrigerator Storage: Store cooled leftovers in an airtight container for up to 3 days, though crispiness will diminish.
- Freezer Preparation: Par-bake for just 15 minutes, cool completely, then freeze in a single layer before transferring to a storage bag. These will keep for up to 3 months.
- Reheating Method: Revive crispiness by reheating at 400°F for 5-7 minutes. Avoid microwave reheating, which produces soggy results.
- Make-Ahead Prep: Cut potatoes up to 24 hours ahead and store submerged in water in the refrigerator to prevent browning.
Enjoyed this recipe? You’ll love these too:
Conclusion
This crispy Potato Finger Sticks Recipe delivers restaurant-quality results in just 30 minutes with simple ingredients and techniques. The cornstarch coating creates exceptional crispiness while oven-baking provides a healthier alternative to deep-frying. Perfect for everyday meals or special occasions, this versatile recipe satisfies cravings without complicated methods.
Ready to impress your family with the crispiest homemade fries they’ve ever tasted? Try this recipe today and share your results in the comments below! Don’t forget to subscribe to our blog for more game-changing recipes that make everyday cooking extraordinary.
FAQs Potato Finger Sticks Recipe
How do you make potato sticks?
To make potato sticks:
- Wash and peel russet potatoes
- Cut them into ¼-inch thick sticks
- Soak in cold water for 30 minutes (optional but recommended)
- Dry thoroughly with paper towels
- Toss with oil, cornstarch, and seasonings
- Arrange in a single layer on baking sheets
- Bake at 425°F for 20-25 minutes, flipping halfway through
- Season immediately after removing from the oven
What are the ingredients in potato sticks?
Basic potato sticks ingredients include:
- Russet potatoes (preferred for their high starch content)
- Vegetable oil (or canola/peanut oil)
- Salt
- Optional additions: cornstarch (for extra crispiness), seasonings like garlic powder, onion powder, paprika, pepper, and herbs
What is the difference between potato finger chips and french fries?
The main differences between potato finger chips and French fries:
- Terminology: “Potato finger chips” is commonly used in the UK, India, and some Commonwealth countries, while “French fries” is the American term
- Shape: Finger chips are typically thicker and shorter, while French fries can range from shoestring to steak fries
- Preparation: Both are made from potatoes cut into strips, but the cutting technique and size may vary
- Cooking method: Both can be deep-fried, baked, or air-fried using similar techniques
They’re essentially the same food with regional naming differences and minor variations in preparation.
Why do soaking potatoes make them crispy?
Soaking potatoes makes them crispier because:
- It removes excess starch from the surface of the potato
- High starch content on the outside causes potatoes to stick together and steam rather than crisp
- Removing surface starch allows better moisture evaporation during cooking
- Less starch means less sugar, reducing excessive browning before the interior cooks
- Cold water firms up the potato’s structure, helping it maintain shape during cooking
For best results, soak cut potatoes for 30 minutes to 24 hours in cold water, then dry thoroughly before cooking.